Terminal multiplexers
What are terminal multiplexers?#
Terminal multiplexer is a tool allowing to have multiple sessions/windows in a single terminal display. It is useful to split screen into multiple shells or accessing to multiple windows from the current one. The handiest use is when you use remote computers/servers to do some computations (let say to learn a model on GPUs). Indeed, throw a ssh connection you can't leave your session without killing your current process. While terminal multiplexers allow the user to log out and keeping the session active. It requires to detach the current session. After a reconnection throw ssh, you have to reattach your detached session (without losing your processes).
I use it a lot on my local machine and on remote servers to have a homogeneous way to interact with my different setups. In this article I will expose Tmux software. In this post I will show you how to install/configure and use it.
Tmux#
I love to use only one multiplexer simultaneously. Nevertheless, it is possible to use multiple ones with a specific profile for each of them. If it interests you, I recommend you to look into tmuxp project. In this post, I will only explain how I configure Tmux and how I use it.
Installation#
On Ubuntu#
sudo apt install tmux
On Fedora#
sudo dnf install tmux
Configuration#
All configurations are in ~/.tmux.conf file.
In this section I will detail my personal configuration.
My configuration files are here.
I will update this post over time as my configuration evolve.
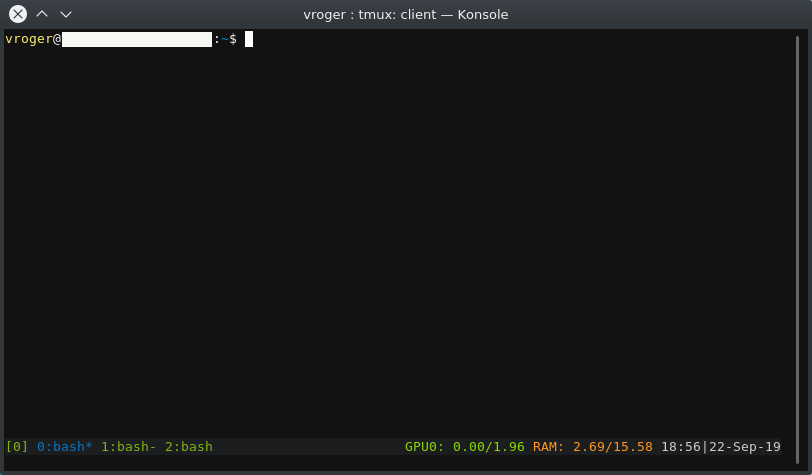
First, lets look at my configuration:

I do not modify a lot the tmux status bar, the only modifications are the following:
- the selected window appears in blue (the others are in green),
- the bottom right display the ram usage for the GPUs and the CPU RAM.
Installation#
My configuration is in two parts: bash scripts to acquire system information and Tmux config file. To install my config you have to download the files here and do:
cp -r tmux_scripts ~/.tmux_scripts
cp tmux.conf ~/.tmux.conf
My scripts are as follows:
gpu.shscript using nvidia-smi command (it is up to you to install it) to get GPU ram usage in Gio. It takes the GPU id as a parameter (first GPU being 0). It is up to you to add more calls to this script (in the tmux.conf file where I set status-right option) to add other GPUs. If you want to improve this behavior, feel free to contribute.ram.shscript to get RAM usage in Gio.
The config file enables mouse interactions (for scrolling, select my split or resize my splits) It also modifies some colors and information displayed in the status bar. The status bar is updated every 10 seconds. Look at The Tao of tmux book for more styling options and how to modify it.
Usage#
First, let start a session. In your terminal (or terminal emulator) type this:
tmux
I currently use the default shortcuts combined with my mouse.
In this post I will only mention the ones I'm using.
To use tmux shortcuts, you have to press <Ctrl+b> first then type:
"for a horizontal split.%for a vertical split.zto zoom in/out of the current terminal.cto create a new tab in your multiplexer.dto detach your session.
I do every other actions like selecting terminal tab, resizing split or select split using my mouse. To reattach your previous session, just type:
tmux attach-session
If you want to know other shortcuts and how to deal with multiple sessions, I recommend you to read The Tao of tmux book or look into the cheatsheet here.
Change default new split pane behavior#
As I found myself always typing the same cd command after creating new split pane.
To tackle this, I add the following lines in my tmux.conf file:
bind % split-window -h -c "#{pane_current_path}"
bind '"' split-window -v -c "#{pane_current_path}"
Now new split panes will have the same directory as the current pane.
Bonus: Alternative for Gnome users#
If you want a tmux-like well configured (by default) and you use Gnome with gnome-terminal, I recommend you to check out Byobu. It has a well-explained video in its home page. Its shortcuts do not always work on other terminals (which is a no go for me as I use Konsole terminal emulator).
Sources#
Hope it helps some of you.
See you again, Vincent.